The Secret to Photographing Glass
The mere mention of photographing glass tends to bring a groan or two to anyone who’s ever tried. It’s up there with photographing shiny chrome taps or lighting, at least in terms of technical challenges. Not only is it transparent – it’s reflective and not, of course, in any direction that is useful. It lacks any clearly defined edges and generally has no tonal changes to give it form. Added to that, it’s full of imperfections and will show up every fingermark and bit of dust it can lay its hands on! If you’re not already put off, then don’t be – there are ways of getting top quality results time and time again if you know how.
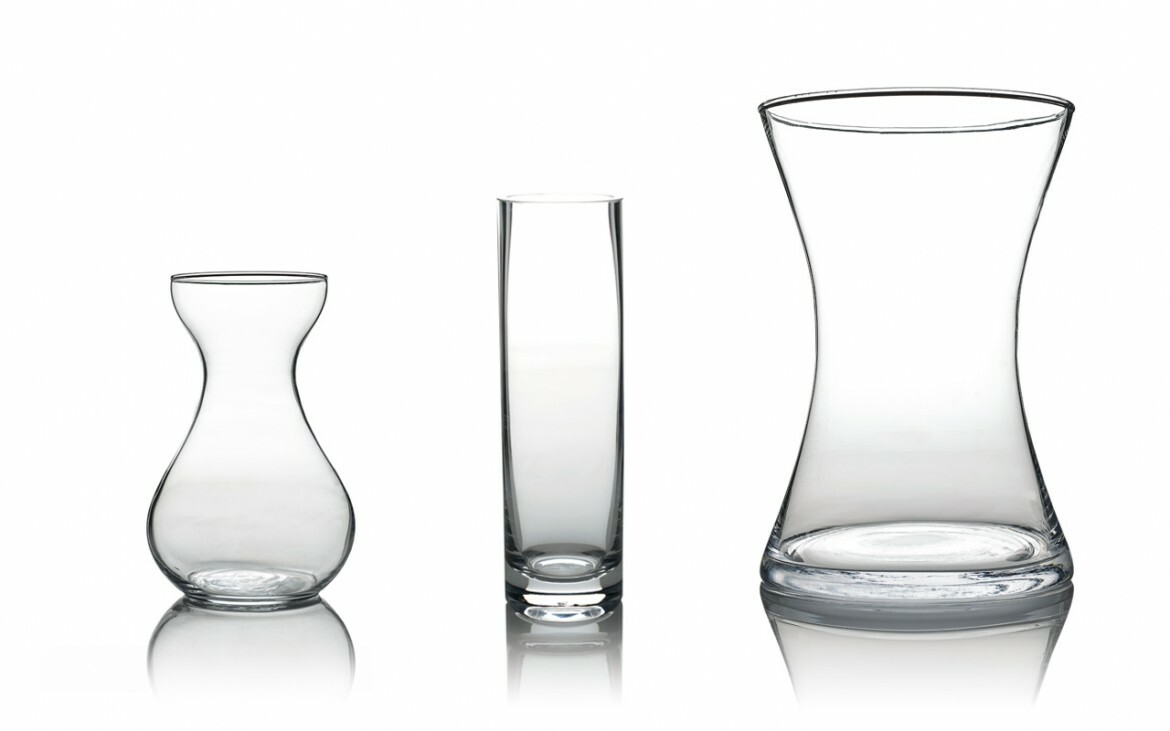
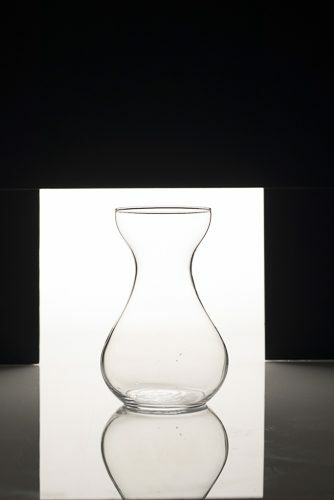
What are the most important things you want to achieve? First you want to give the object some shape by creating a nicely defined outline around the edges. Secondly, you need to avoid any unwanted and distracting reflections caused by lighting, camera (and cameraman) and any other equipment near the set. The example below shows what we are aiming for.
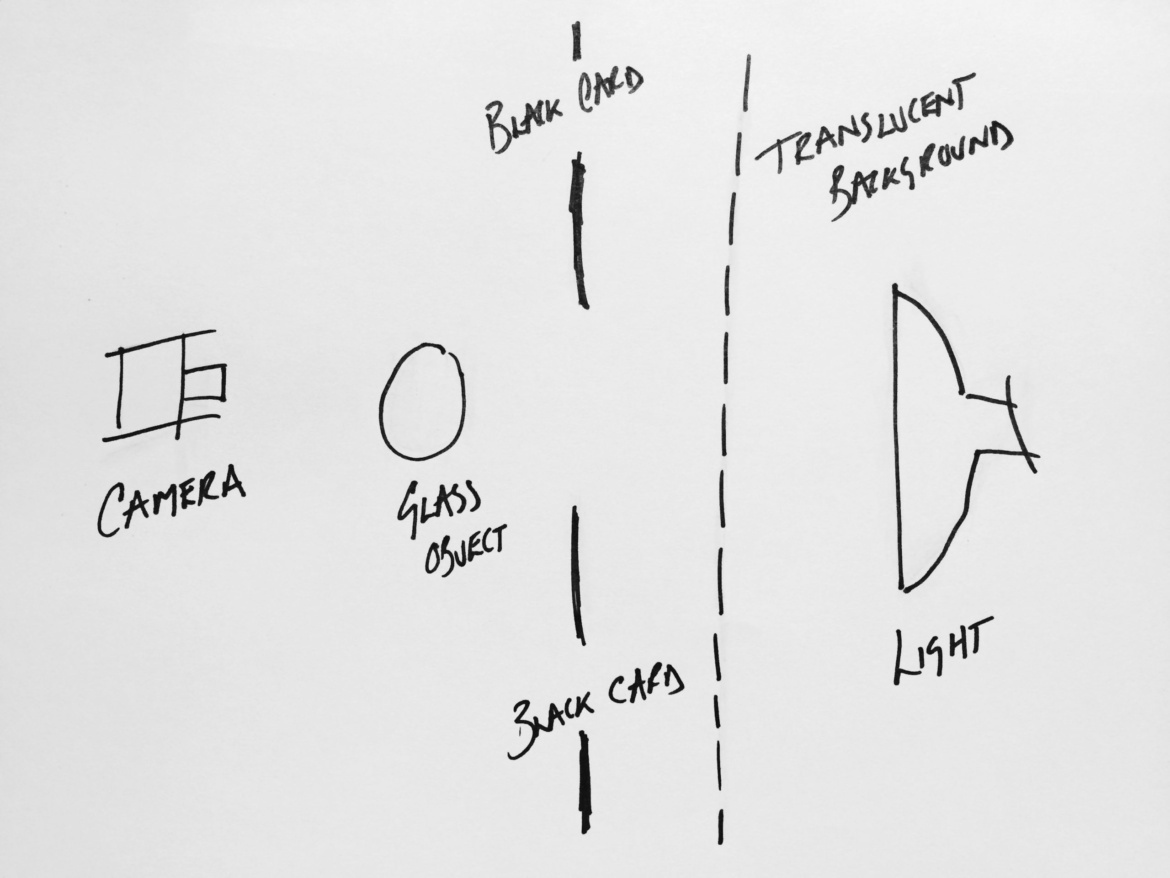
To create the look above, begin by setting up your worktop with white perspex, which will give you the nice crisp reflections. Then, position the subject (or subjects) and give them a first clean. Set and frame the camera – a longer lens is beneficial to avoid being too close to the glass. The next step is to position the background. Again, I tend to use perspex as it gives a sharp definition to the lighting but you could use a white sheet, tracing paper or anything white that transmits light. Then position your light behind the background, making sure it has enough spread to fill the whole frame. Once that’s done, bring in some black card to the left and right of the product, moving it around until the desired outline effect is achieved – see the diagram below for more detail. I’ve also held a piece of black card above the smaller glass items – this gives some definition to the top edge. In case it’s not immediately obvious – this is an overhead diagram of my set up!
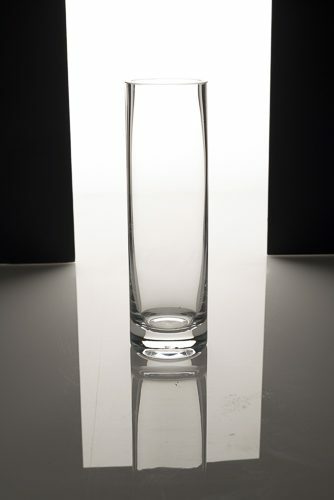
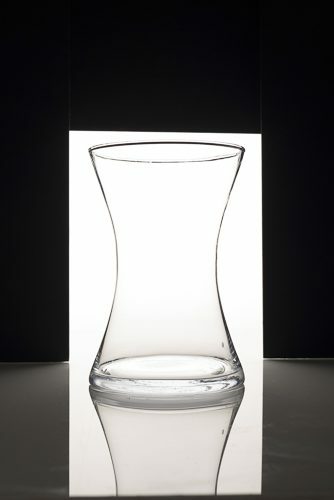
Once everything is in position, take some meter readings. If you’re using flash, a handheld meter is essential. For continuous light you can use the camera’s meter. There’s no ‘right’ reading here but as a general rule, you’ll need to compensate for the expanse of white by increasing the camera exposure by a couple of stops. This should give you a good tone that retains some form to the glass. You’re not aiming for a completely white background – to get the right level of tone and form, you need the camera to be recording the background as a pale grey. Give everything another good clean and then you’re ready to shoot. As always, shoot a test with a colour checker in shot. Below are the individual shots we comped together for our final image.
When you’re happy with the shots it’s time to edit – we use a combination of Lightroom and Photoshop, but there is no shortage of good image editing software available. A typical workflow would be:
• Open the image
• Assess levels (exposure) and adjust if needed
• Check and correct colour balance using Grey card or colour checker
• Make sure everything is nice and square, crop
• Sharpen
• Retouch if needed
• Cut out for a white background
• Export to size and format required

